The Best Whetstone for Japanese Knives: A Comprehensive Sharpening Guide
Key Takeaways
- Understand the importance of maintaining sharpness in Japanese knives.
- Learn how to choose the best whetstone based on grit level and material.
- Follow a step-by-step guide on sharpening techniques and angles.
- Discover the difference between honing and sharpening.
- Learn maintenance tips for both your knives and whetstones.
Table of Contents
- Understanding Japanese Knives: History and How to Sharpen Japanese Knives
- Choosing the Best Whetstone for Japanese Knives: Types, Materials, and Buying Tips
- Step-by-Step Japanese Knife Sharpening Guide: Sharpening Angle for Japanese Knives
- Maintenance and Care Tips: How to Sharpen Japanese Knives and Keep Them Sharp
- Conclusion: Best Whetstone for Japanese Knives and the Japanese Knife Sharpening Guide
- Call to Action: Share, Learn, and Stay Connected – How to Sharpen Japanese Knives
Understanding Japanese Knives: History and How to Sharpen Japanese Knives
Brief History and Unique Features
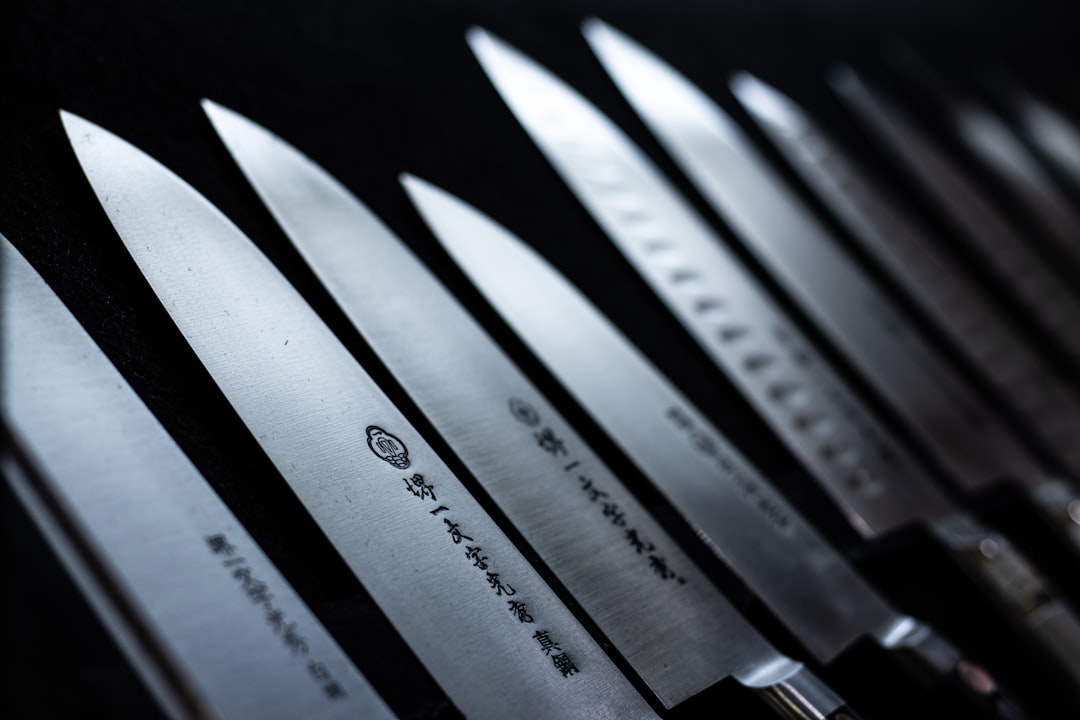
- Japanese knives have been made for centuries, using skills handed down from samurai sword-making.
- The blades are usually thinner, harder, and made of high-carbon steel. This makes them very sharp.
- Japanese knives are often made for specific uses, like slicing fish or chopping vegetables.
How Japanese Knives Differ from Western Knives:
- Blade Geometry: Japanese knives are thin and have a sharper edge.
- Hardness: Harder steel means a sharper edge, but it also makes the blade a little more fragile than softer Western blades.
- Intended Use: Japanese knives often have a single job, like a yanagiba for slicing sashimi.
Importance of Maintaining Sharpness
Knowing how to sharpen Japanese knives is important for three big reasons:
- Performance: Only a sharp knife will glide through food cleanly, keeping each slice neat and fresh.
- Safety: Dull knives can slip and are more likely to cause accidents.
- Longevity: Regular sharpening means fewer chips or broken tips, so your knife lasts longer.
Choosing the Best Whetstone for Japanese Knives: Types, Materials, and Buying Tips
Finding the best whetstone for Japanese knives means understanding the details. Here’s what you need to know:
Types of Whetstones by Grit Level
Whetstones are sorted by how rough or smooth they are. This is called the "grit."
Arato (Coarse Grits – <1000 Grit)
- Purpose: Fix broken, chipped, or really dull edges.
- Use: Shaping a new edge or repairing damage comes first with a coarse stone.
- More details: Which Whetstone Grit to Choose for Sharpening Japanese Knives
Nakato (Medium Grits – 1000–3000 Grit)
- Purpose: Most daily sharpening happens here.
- Use: For knives that aren’t damaged but have become dull.
- Find more info: How to Sharpen
Shiageto (Fine Grits – 4000–8000 Grit)
- Purpose: Polishing and giving your blade a razor finish.
- Use: Finish sharpening here for clean, shiny, and ultra-sharp edges.
- More about whetstone grits for Japanese knives
Materials of Whetstones: Natural vs. Synthetic
Natural Stones
- Quarried from nature and prized for unique qualities.
- May have uneven grit, usually more costly.
- Some pros love these for traditional sharpening.
Synthetic Stones
- Man-made with consistent quality.
- Japanese water stones are especially popular. They're fast-cutting and easy to use.
- Preferred for their reliability and quick results. For more, see whetstone material guide.
Key Factors to Consider When Selecting the Best Whetstone
Grit Level
- Decide based on your needs:
- Repairing: Coarse grit (<1000) for damaged blades.
- Sharpening: Medium grit (1000–3000) for regular touch-ups.
- Finishing: Fine grit (4000–8000) for final polish.
- Learn more: Whetstone grit selection for Japanese knives
Stone Size
- A longer, wider stone is easier and safer to use.
- You want the stone to be bigger than the knife for steady sharpening.
Water-Only Lubrication
- Always use water with your whetstone.
- Never use oil on Japanese water stones—it can ruin them.
- See more info: Which Whetstone Grit to Choose for Sharpening Japanese Knives
Stone Maintenance
- Some stones need soaking:
- Coarse (220, 1000 grit): Soak for 10–15 minutes.
- Fine (3000+ grit): Usually just need water splashed on top.
- Maintain your stone, or you’ll get uneven, rough sharpening.
- For instructions, see How to Sharpen Kitchen Knives with Japanese Whetstones
Recommended Whetstones: Pros and Cons
1000/6000 Grit Combination Whetstone
- Pros:
- Good for most home cooks (sharpening + finishing).
- Cost-effective—two grits on one stone.
- Covers common kitchen needs.
- Cons:
- Not rough enough to repair big chips.
- More at: Best method for sharpening knives with a whetstone
Individual Stones for Specific Tasks
- Coarse (<1000 grit):
- Pros: Repairs chips and does tough jobs.
- Cons: Not needed for daily sharpening.
- Fine (4000–8000 grit):
- Pros: Makes edges ultra-sharp and smooth.
- Cons: Requires more skill and time for best results.
Step-by-Step Japanese Knife Sharpening Guide: Sharpening Angle for Japanese Knives
Want to master Japanese knife sharpening? Here’s the step-by-step process, with tips and the right sharpening angle for Japanese knives.
A. Preparation: Setting Up Your Sharpening Station
What You Need:
- Whetstones (with the needed grit)
- Container of water to soak the stone
- Towel for water drips
- Non-slip mat or damp towel under the stone
- Optional: Angle guide
How to Prepare:
-
Soak Your Whetstone
- Coarse and medium stones (220–1000 grit): Submerge in water for 10–15 minutes until air bubbles stop. Don’t skip soaking.
- Fine stones (3000+ grit): Usually need just a splash of water.
- Stay wet during use—sprinkle as needed! How to Sharpen Japanese Knives
-
Set Up Safely
- Place the stone on a stable, non-slip surface.
- Use a stone holder or wet towel to keep it steady.
B. Sharpening Angle for Japanese Knives
Ideal Sharpening Angle
- Hold the blade at 10–15 degrees to the stone.
- Lower angles (10 degrees) = sharper edge, but can be less durable.
- Higher angles (15 degrees) = tougher edge, but may not be as sharp.
How to Keep a Consistent Sharpening Angle
- Visual guides: Stack two coins (like a penny and nickel) under the flat of the blade. That's close to 15 degrees.
- Angle guides: Simple devices that clip to the spine and help you hold the right angle.
- Wrist and body movement: Keep your wrist locked and move your whole body, not just your hand, along the stone’s length.
- Blade curve adjustment: For curved edges (like a santoku or gyuto), raise or lower your elbow to match the blade curve along the stone.
How to Sharpen Japanese Knives
C. Water Stone Sharpening Tips
Here’s the best way to use a water stone for sharpening:
1. Step-By-Step Sharpening Process
a. Position the Knife
- Lay the knife edge on the whetstone at the correct angle.
- Hold the handle with one hand, use your fingers of the other hand to apply gentle pressure near the edge.
b. Sharpening the First Side
- With the tip at one end of the stone, draw the blade back and forth along the entire stone.
- Cover the whole edge, from tip to heel, with even strokes.
- Use gentle, smooth movements.
- Keep the stone wet—add water if it starts drying out.
c. Checking for a Burr
- After several strokes, feel for a tiny burr along the edge. This means metal has moved to create a new sharp edge.
d. Sharpening the Second Side
- Flip the blade over.
- Repeat the sharpening process until you feel a burr on this side.
e. Refining the Edge
- Switch to a finer grit (like 3000–6000).
- Use lighter pressure and smooth, slow passes.
- This polishes and sharpens for a razor finish. Up to 50 passes may be needed.
f. Removing the Burr
- Alternate light strokes, one per side, to knock off any burr left.
Find complete details at How to Sharpen Japanese Knives and Best Method for Sharpening Knives with a Whetstone.
2. Common Mistakes to Avoid
- Inconsistent angle: Leads to dull sections and uneven edges.
- Not soaking the stone properly: It dries out and won’t sharpen well.
- Too much pressure: Might damage the edge and ruin your knife.
- Skipping grit levels: Always move from coarse to medium and finish with fine.
D. Honing vs Sharpening Japanese Knife
What’s the Difference?
- Honing: Straightens and realigns the edge. Uses almost no material. Keeps the knife sharp daily. Done with a honing rod.
- Sharpening: Removes metal to make a new edge. Needed when the knife is truly dull. Done with a whetstone.
Learn more: How to Hone a Japanese Knife
When and How to Hone vs Sharpen:
-
Hone:
- Do before or after using your knife, especially with a ceramic rod.
- Hold the rod upright and swipe the edge down at the right angle.
-
Sharpen:
- Do when honing stops restoring the edge.
- Follow the steps above for sharpening with a water stone.
Quick Honing Steps:
- Hold the rod straight up and down.
- Place the blade at the correct angle (about 15 degrees).
- Stroke the blade down and back, one side and then the other.
Quick Sharpening Steps:
- Soak the stone.
- Hold the correct angle.
- Use smooth, even strokes.
- Refine and polish with finer grits.
For more Japanese knife sharpening guide tips and water stone sharpening tips, see the linked sources above.
Maintenance and Care Tips: How to Sharpen Japanese Knives and Keep Them Sharp
Caring for your knives and stones keeps them sharp, safe, and ready to use.
A. Whetstone Maintenance
-
Clean After Use
- Rinse under cool water to remove any metal debris.
- Use a soft brush if anything is stuck.
-
Dry Properly
- Air dry completely before storing.
- Don’t place in sunlight or on heaters.
-
Flatten Regularly
- Stones wear unevenly and can develop dips.
- Use a flattening stone or lapping plate.
- Check every few uses and keep your stone flat.
B. Knife Maintenance
-
Store the Right Way
- Use a wooden knife block, magnetic strip, or blade guard.
- Never throw knives loose in a drawer—this dulls and chips them.
-
Clean with Care
- Hand wash only; don’t use a dishwasher.
- Dry right away with a towel to prevent rust spots.
-
Use the Right Cutting Surface
- Always cut on wood or plastic.
- Avoid glass, ceramic, or stone because they dull the edge quickly.
-
Inspect Frequently
- Check for chips, rust, or wear.
- Take care of problems quickly so your knife lasts longer.
For a full Japanese knife sharpening guide and more on how to sharpen Japanese knives, see earlier sections and provided links.
Conclusion: Best Whetstone for Japanese Knives and the Japanese Knife Sharpening Guide
Let’s recap the essentials:
- Choosing the Best Whetstone for Japanese Knives gives you the sharpest, longest-lasting edges.
- Proper sharpening technique and a steady sharpening angle for Japanese knives result in safer, better cuts.
- Maintaining your stones and managing your knives wisely keeps your tools in peak form year after year.
The Benefits:
- Food prep is faster, cleaner, and safer.
- Japanese knives stay beautiful and functional longer.
- With practice, you’ll master sharpening and impress everyone in the kitchen.
Start small, be patient, and you’ll see huge improvements in both knife performance and your cooking results.
Call to Action: Share, Learn, and Stay Connected – How to Sharpen Japanese Knives
- Share Your Experience: Have you tried sharpening your Japanese knives at home? Leave your tips or questions in the comments below!
- Explore More: Check out our other blog posts or look for detailed Japanese knife sharpening videos linked on our site.
- Printable Guide: Download our Japanese Knife Sharpening Checklist for hassle-free sharpening in your kitchen.
- Stay Connected: Subscribe to our newsletter for the latest sharpening tips and exclusive content. Follow us on social media to join our culinary community and stay updated!
Take these steps and discover just how much of a difference the best whetstone for Japanese knives can make—both in performance and in pride, every time you cook.

